Showing posts with label Holiday. Show all posts

Thursday, January 18, 2018

Valentine Kitten Critter Cups

5:00 AM

Hello Ai fans!

I am so excited to bring you this new stamp set and dies, Critter Cups.  You have everything you need to stamp and cut countless animals.  This set is designed to cut out a bunny, kitten, raccoon and a fox.  As I was looking at the faces I saw many other animals.  I'm excited to see what all of you can come up with. Here are the main four images you can do finished.  Because Valentines day is coming up, I'm going to walk you through the a Valentine Kitten Critter Cup.


Stamp out your main images.  I stamped out one body with a black alcohol marker safe ink onto the center of a piece of 6" x 1 1/2" piece of Spectrum Noir Ultra Smooth Premium White Paper.


 Stamp the face onto a piece of paper that is at least 3' x 3".  There are four faces to choose from.  I used the kitten face and a tail from a white piece of paper.  Then I cut them out.


Then do all of the die cutting. I'd rather get it out of the way just in case I make any mistakes with the coloring.  I line up the dies for the left and right foot and cut them out. I also line up the middle front paw die cut an tape it down.


Now you just need to cut out the right side front paw die cut on the body. Also cut out two ears from white paper along with a tail.  Cut the bow tie from a scrap of the Echo Park I'd Rather Be Crafting 6"x 6" paper pad. 


 Now for the fun part! You get to start coloring. I colored  the perimeter of the Valentine label and the inner parts of the ear and the pads on the paws with a RV10 Copic.  I colored the tummy and the front paws with a RV30 Copic.


I used a very simple technique to color the calico spots onto my kitten.  No blending was needed!  First, I used The Cool Grey Copic's. I just squiggled on the C7 at the center. I went around it with the C3 and C1.  Sometimes they overlapped, sometimes they didn't.  I just keep them irregular. Next, I added the Brown's  the same way.  For those I used E30, E35 and E37. The cheeks and pads of the paws were added with the RV10 Copic.  


The head was attached to the body with Tim Holtz Collage Medium.


Now you want to very gently curl the body around a roll of Washi tape that is around the size of the finished treat bag.  Tip: Be very careful around the feet. The first few times you bend it are important because you want to be sure they curve and don't crack.  I attached the tail with the collage medium at this point.  I added red line sticky tape to the inside to close up the back..  It is very sticky and you don't have to wait for it to dry.

 
I added extra detail to the eyes and nose. I first used a black Sakura Glaze pen.  It's different than a gel pen because it looks like it was embossed because it is raised.  I set it aside to dry. Once it was dry, I added a dot of the white Sakura Gel pen. This brings life back to the  image.   I added the bow tie and then add an enamel dot to the middle.

The last thing to do is add the treat bag and close up the back of the body.  Now it's finished!


Thanks for stopping by and Have a Great Day!

Tuesday, January 16, 2018

Nuts About You

5:00 AM

Hello Ai fans!

We're less than a month away from Valentine's Day so I made up two more Valentine cards. They're similar, yet different.  I used Nuts About You 4885. This set has the cutest puns as well as the simple sentiment that I used. The images are really fun to color.


I used Copics and Spectrum Noir alcohol markers together to color us my images.  I stamped the images onto Spectrum Noir Ultra Smooth Paper with the Simon Says Stamp Intense Black ink pad and then colored them with my alcohol markers.


For the first card I fussy cut the image and raised it over the decorative paper layers with foam tape.  The decorative papers I used are from the Lost and Found Heirloom collection by My Minds Eye. 


The second card I die cut the colored image from the My Favorite Things Double Stitched STAX die cuts and foam taped it onto the decorate paper layer. The decorative papers I used are also from the Lost and Found Heirloom collection by My Minds Eye. 


Here is the list of the markers I used
I used Copic markers except where noted
Bird - B00, ( Spectrum Noir AB1, AB3)
Envelope - B00, Blender
Squirrel - E33, YR14, E37, RV10, tummy E31
Mailbox - C1, C3, C5, C7
Post Grey - C1, C3, blender
Heart - RV10, RV13
Nut Base- (Spectrum Noir RB1, RB3)
Nut Lid - E35, E37, E49
Reds - R14, R37, R89


Thanks for stopping by and Have a Great Day!

Thursday, January 4, 2018

Sweet Wishes

Hello Ai fans!

Welcome 2018! I hope your holiday's were amazing and filled with joy. I really missed blogging and having daily inspiration from my fellow design team members.
I'm going to kick things off with a Valentine's Day card using the Sweet Wishes Mini Try Fold Set 4848.  I am in love with that adorable little bird sitting inside the mailbox.

I followed the directions on the package and folded my watercolor paper into three even panels. I stamped the images with Versafine Onyx Black ink.  I stamped each layer and then cut the inside with the included cutting die. As I cut each layer I would line up the stamp for the next layer.  I added a border using a Lawn Fawn die from the Valentine Borders set.


I colored this image with Tombow Brush Tip Markers.  It was a very fast and easy process.  I even colored the wreath twice and layered it on the front panel and added it with foam tape for some extra impact.  I colored in layers with a very loose style.  I mostly followed what was on the package of the stamps. 


The cutting die on the second layer also scores the bottom of the mailbox so you can have it open or closed when you give away the card.  I added color to both sides of the door.  I added some sequins to this layer, as well as the front, using collage medium.


This is the last layer.  I usually fold it the other direction, but I changed it up a bit this time.  That's part of the fun with these stamps.  You can experiment and come up with new folds.  Let me know if you've come up with a different fold that you think I might want to try out.  

Thanks for stopping by and Have a Great Day!

Thursday, November 2, 2017

Singing Snowman Pop Card

Hello Ai fans!

Today is the release of Ai's five newest Pop Cards.  These really take pop cards to a new level!  I'm using the Singing Snowman Popcard 4943 stamp set.  It comes with the stamps and dies to cut out the everything but the Popcard Template 4862.  Remember to get the popcard template if you haven't bought one in the past. You will need it for the card to work.


I used a die cut from Crafter's Companion to frame the circular window.  It's from the Downtown Abby collection called Ornate Circle Frame.  I used a Lifestyle Crafts die called Label to frame the greeting that is stamped with Onyx Black Versafine Ink.  I edged the label with Weathered Wood Distress Ink and a round foam inker. All of the papers are from a collection I got at Michael's last year. It's from Craft Smart and is called Crystal Frost. I edged the layers with a Pilot medium point silver marker.

 It is not difficult to assemble the card.  Just follow the simple directions provided here on last weeks blog post by Sharon.  She walks you through how to put together the mansion card, but it is similar to put together all five of the new designs. 


The images are stamped onto Strathmore 140 Lb.watercolor paper with a Jet Black Archival ink pad. They are colored with a combination of Marvy LePlume II and Tombo Dual Brush Markers using a #4 paint brush.  
Marvy Le Plume's used Pine Green 72, Persimmon 89, and Black 1.
Tombow's used Sea Blue 373, Pink Rose 703, Brown 879 and Pale Cherry 912.


This is what the side of the image looks like when the card is completely open.  I also added in one of the birds above the front opening. 

Be sure to join the Third Dimension Challenge for your chance to win prizes!


Thanks for stopping by and Have a Great Day!


Thursday, October 12, 2017

Happy Meow-lloween

5:00 AM

Hello Ai fans!


I told you this in my last post, I love Halloween!  I also love bats and cats.  With all of that being said, you might have guessed that the Meow-lloween Set 4786 was practically made for me. It has three main images and several greetings.  I just had to make a shaker card with it!

It was quite difficult to get a picture of this card.  The acetate and sequins we giving me a hard time.


I stamped my image onto Strathmore 140 Lb. Watercolor paper with a Jet Black Archival ink pad using my Mini Misti.  I then colored it using my Marvy LePlume II markers.  Colors will be listed below.  I scribbled the markers  onto my Ai Watercolor Palette & picked then up with my WC #4 brush and a small amount of water.
The greeting is stamped onto a flag banner with Versamark Watermark ink and embossed with a Stampendous PearLustre Orange embossing powder.


I made this into a shaker card using Stampendous heat resistant acetate that I glued behind the black die cut layer with glossy accents.  I applied a layer of black foam tape around the opening.  Be sure to have a complete seal when you're making a shaker card so nothing falls out.  I added three colors of translucent 5 mm sequins and tiny yellow stars before I attached everything together like a sandwich.

I used a retired paper collection called Eerie from Basic Grey.


I used very few Marvy LePlume II Markers for this card.
Bat - Black 1
Cat - Rosewood 30, Brown 6

Thanks for stopping by and Have a Great Day!


Thursday, September 7, 2017

Light Up Halloween Mansion

12:00 AM
Hello Ai fans!

It's week two of the Off Kilter challenge.  More interactive stamps have been released on the blog. Be sure to check them out and to join the challenge.

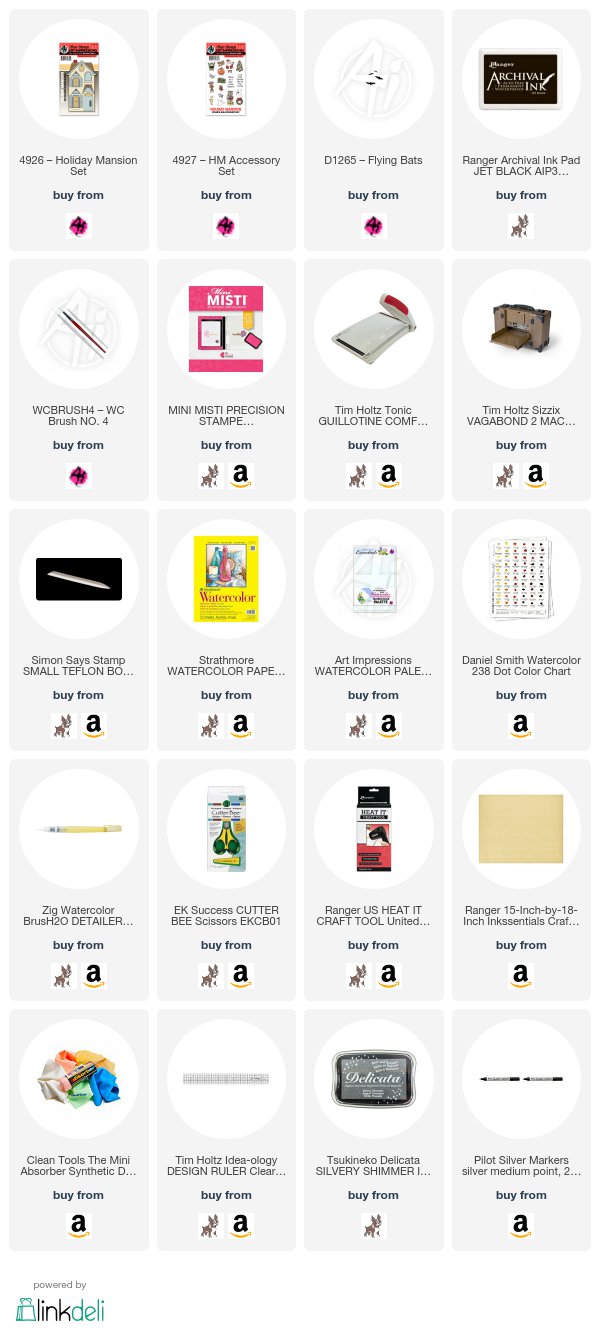
Today I'm using the Holiday Mansion Set (SKU #4926) and HM Accessory Set (SKU #4927). I also used Flying Bats (SKU #D1265). The mansion can be used for any occasion. It comes with the dies that cut out the dies, windows & shutters! The HM Accessory Set comes with images to make your mansion up for Halloween or Christmas. It also includes the dies. I used it for Halloween this week, but I'm sure you'll see me use it for Christmas soon.

 I stamped my images onto watercolor paper and used my die cuts. I colored all of my images my images with Daniel Smith watercolors from a dot chart. After everything was dry, I backed the image with silver vellum and cut out the entire house. I edged the brown decorative paper with my silver marker before I cut openings in the center.  The openings are slightly larger than the mansion windows.  I attached the mansion over top of the openings.  The ghosts, pumpkin & monster were added with foam tape.


Last Christmas I had purchased some light up Christmas card kits.  They are very simple to use.  They're a tiny string of eight lights attached to a battery pack.  It has an on/off switch. It's the little black piece you can see in the upper left hand part of the card above the ghost.  The lights are colored with my Spectrum Noir Alcohol markers. I used thick foam the size of the battery pack to hold the top layer to the card. 


Thanks for stopping by and Have a Great Day!

Compensated Affiliate Links Used

Tuesday, January 31, 2017

Winter card featuring the Frosty Fairy Friends stamp set from Lawn Fawn


I made a winter card featuring the Lawn Fawn stamp set Frosty Fairy Friends.  I colored it with my Spectrum Noir Alcohol Markers.  They're so easy to color with because the colors just flow together.  The images were stamped with Simon Says Stamp Intense Black Ink Onto Spectrum Noir Ultra Smooth Premium White Cardstock.  The background is colored using my Stormy Sky & Cracked pistachio Distress inks.  I added in some stars with a Gelly roll pen.  All of the layers as well as the images were cut out using my Brother Scan N' Cut Machine.  The only layer that wan't cut on the machine is the card base.  It's a nesting die cut called Doily Circles from We R Memory keepers.
 I've supplied you with the links to all of the products at the bottom of my post. Compensated affiliate link used at no extra cost to you. 


Of course I've filmed the entire process.  Here is my you tube video:

Thank you for spending some time with me.  If you have any questions please let me know.  Jil